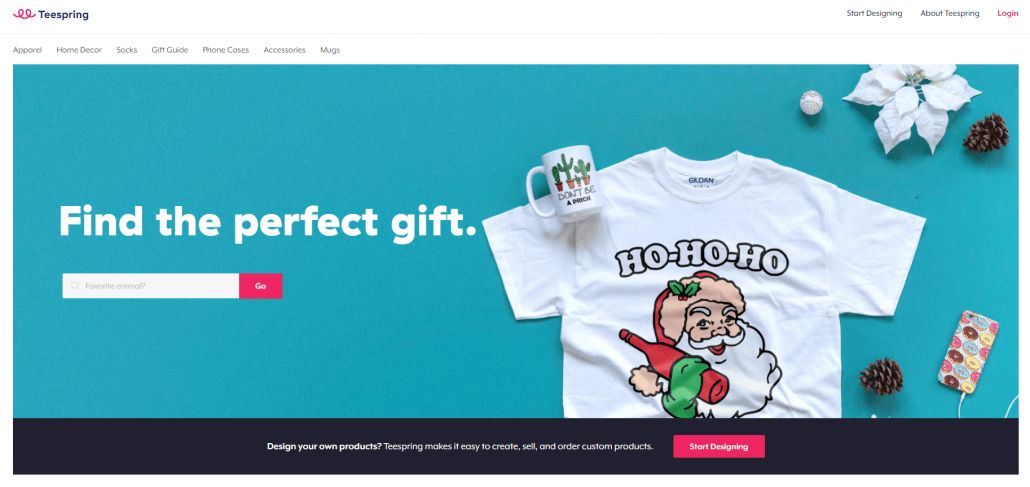
Teespring Review: Make Money Designing Custom T-Shirts
Teespring Review: Make Money Designing Custom T-Shirts
This is the second time I ever tried Teespring, but my first time writing a Teespring Review. As a designer, this is a fun way to earn extra money by designing fun tee shirts and other gear. You essentially design funny/clever t-shirts and then market them to be sold.
What is Teespring?
Teespring is a legit website where you can design custom tee shirts and other apparel such as hoodies, socks, mugs etc. using their proprietary online design software. Once you create a custom design, you can share a link with your friends who can buy your t-shirt design directly on Teespring. The money, printing and shipping are all handled by Teespring.
The difference between Teespring and other custom t-shirt design places is the shirts aren’t actually made until you have a minimum order.
This way you don’t have to buy a bunch of shirts you’re not sure will sell or not. Thus filling your garage full of crappy shirts. All you do is create the design and TeeSpring handles all the orders, payments and shipping once a minimum amount of shirts are sold. Then you as the designer get a small profit off the orders sold.
Is Teespring Legit?
Absolutely! We’ve personally used Teespring and found numerous positive reviews about the company. They’ve been around for years and built up a solid reputation. Even Forbes mentioned them as a great way to make money by selling well-made t-shirts and other gear.
Yes, Teespring Pays You!
The biggest bonus to Teespring (and why I wanted to write this Teespring Review) is that once you get the minimum amount of orders. You as the designer get a cut of the profits for creating the design!
Teespring handles all the heavy work (collecting money, printing, shipping), but since you are the one that created the shirt design and marketed it, you get a portion of the money made. Of course, Teespring takes their share, but you get yours too.
It’s a unique sidehuslte if you’re a creative type that can create some clever t-shirts and market them.
How Does Teespring work?
Head over to Teespring and hit “Start Designing”. It’ll ask you to create an account with them. It’s just the basic name, email, and password. They don’t ask for any payment information when your first setting up an account or first creating a shirt design.
You’ll then be asked to “Pick Your Canvas”. They have a number of options since they originally started. You can create unique/clever designs on a wide variety of items including:
- Canvas Prints
- Beach Towels
- Phone Cases
- Wall Tapestry
- Posters (12″x24″) & (24″x36″)
- Flags
- Indoor Pillows
- Socks
- Apparel
- Stickers
- Tote Bags
- Mugs
I am going to focus on t-shirts for this Teespring Review since that’s what they’re famous for.
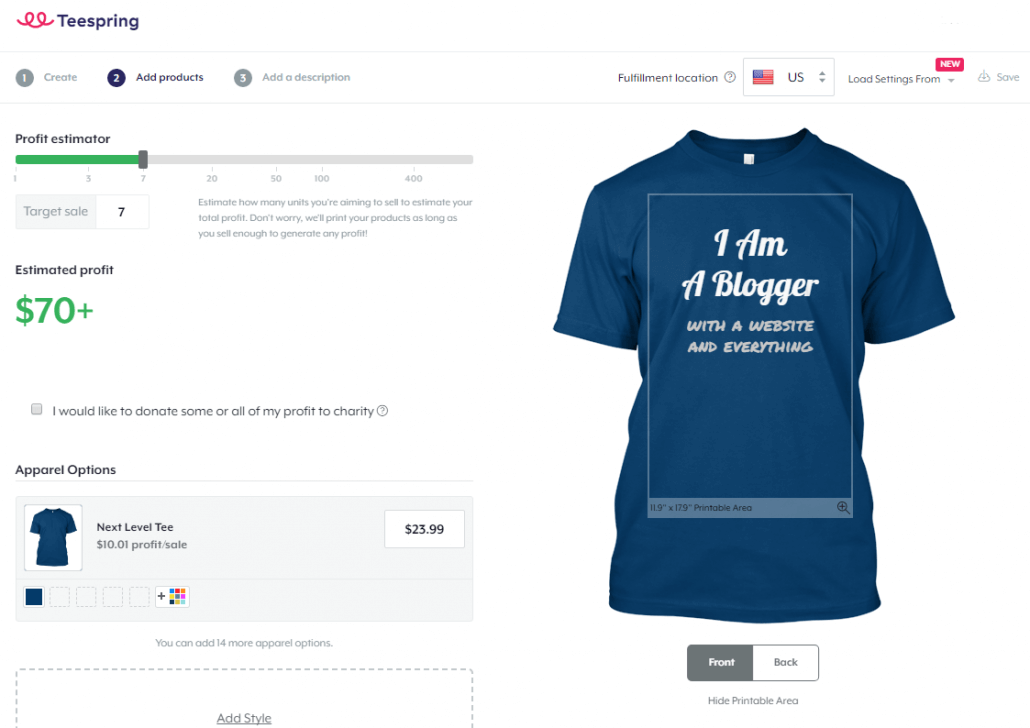
I select apparel. This takes you immediately to their online design software where you can create a completely unique t-shirt design from scratch.
It’s a bit intimidating, I just created a basic word print design (I find inspiration from Amazon’s funny shirts). I obviously didn’t get too crazy, but you have a lot of options for what you can do including uploading your own custom designs.
I was impressed with the variety in Teespring’s online software program, it really was impressive. It’ll work great for beginners if you don’t have your own design software like Adobe Illustrator. This is what their online software looks like.

Once you finish a design, Teespring will let you set the price for how much you want to sell the shirt for. You could set the price for $50 per shirt if you’d like. It may be more than people want to buy a shirt for, but it’s up to you.
You’ll start off with Teespring’s recommended sell price.
In addition to what you set the price at, Teespring will show you how much of a profit you’ll make based on the number of shirts and the selling price. So simple economics, the higher price you set and the more you sell, the more profit you’ll make. In the Teespring Review example below, if 7 shirts are purchased, I would make $70 or $7 per shirt if I sell for $23.99.
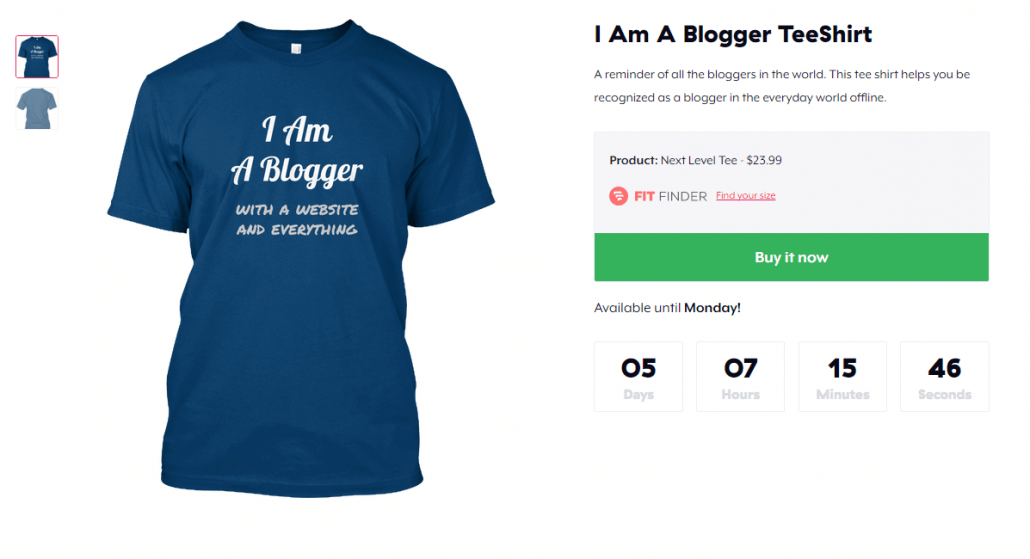
After you set the price, you will create a profile on your new shirt design. This is what people will see when they view your shirt on Teespring.
- T-Shirt Title
- Profile
- Custom URL
Take some time with this. Giving your campaign/shirt description a clever description can really help sell shirts to people on the fence.
If you want to check out the t-shirt design I did for this Teespring Review, go to Teespring.com/i-am-a-blogger-teeshirt where you’ll have the option to buy. It’s very basic. I like to set the bar low for you to create your own amazing shirt design!
That’s it. Now anyone can see your shirt and buy it. The biggest thing from here is sending the link to your friends, post on your blog or share with your social network to buy the new shirt.
A popular strategy I’ve seen, create a clever t-shirt idea for a specific niche of people. For instance, the famous “Don’t worry I’m a ______” tagline. To give an example, I’ve seen “Don’t worry I’m a Nurse” and people created specific facebook ads for people who listed their occupation as “Nurse”. I believe it’s been really successful.
Teespring Review Pros
- You only have to create the design, Teespring will handle the creating/paying/shipping info on their end. This is a huge space saver from the days you had to store tee shirt inventory in your garage.
- You get paid per t-shirt. You can set your own price for your designs and that profit goes to you. So if you LOVE creating tee shirts, you can make quite a bit of money.
- Their design software is pretty easy to use.
- If you’re organizing shirts for a large group, you can create the shirts on Teespring and have everyone pay on their own via the link you send. Way less chaos.
Teespring Review Cons
- Even if you create the best t-shirt design ever, you have to market it completely on your own. Meaning you have to email it to all your friends or create Facebook ads to drive traffic to Teespring’s website for people to buy your t-shirt. You’re basically selling Teespring’s t-shirts for them.
- You’re limited on the amount of space you can design on the front/back of the shirt. This makes it easier for Teespring to print onto shirts, but prohibits super creative designs that take up the entire shirt. So no sleeve designs or anything like that.
Teespring Review Conclusions
I like the idea of Teespring. It allows you to quickly create a custom t-shirt design to share with all your friends for them to buy. However, it doesn’t seem to be set up for a permanent side hustle. There are a lot of better/easier ways to earn more money.
Once you create the t-shirt design, it takes A LOT of effort and marketing dollars to get those shirts to sell. So unless you have a particular network of people who are willing to buy a specific t-shirt, I wouldn’t recommend this as a permanent side hustle.
Wallet Squirrel is a personal finance blog by best friends Andrew & Adam on how money works, building side-hustles, and the benefits of cleverly investing the profits. Featured on MSN Money, AOL Finance, and more!