How I made $1.88 Selling Stock Photography in 10 days as a new Shutterstock Contributor
I’ve always been fascinated with stock photography as a way to make money. So I decided to try it and share my success as I sold my first stock photo in 10 days as a Shutterstock Contributor.
Honestly, I’ve been wanting to try this for a while since discovering Adam of Team Wallet Squirrel made $1,000 off a single photo (sold multiple times)! A photo he took randomly of the St. Louis Arch while supporting me as I ran the St. Louis Marathon in 2012.
This is my 10-day review as a new Shutterstock Contributor!
What is Stock Photography?
These are digital photos that are sold online, usually for commercial purposes. Sites like Getty Images and Shutterstock are great examples of websites that sell stock photography.
It’s an interesting passive income because all you have to do is upload a photo once, as a digital product, and earn money each someone downloads it! This can occur thousands of times without any additional effort on your part.

Great Stock Photography Example
How I Started and Sold my First Stock Photo in 10 Days
I’m not a professional photographer or a good photographer by any means, but I applied to both Shutterstock and iStockPhoto, two top stock photography websites, on the off chance they’d accept an amateur like me.
Unexpectedly, I was accepted to both.
There are other Stock Photography websites out there, you can apply to. Here is a list of the top 10 I discovered in my research, but I’ll only focus on one (Shutterstock) for this article. I assume they all have some similarities.
Day 1 – Understand what stock photos sell best
In order to start submitting photos, I had to understand what stock photography sites were looking for, and sell best. People aren’t going photos of clouds taken from an airplane window.
In fact, they specifically ask you don’t submit photos of clouds. They have MILLIONS of them.
You need to submit photos that could be used for commercial purposes. Some types of photos that sell best are Portrait Photography, Food Photography, Landscapes (usually with people) and fine art photography (artsy). Above all, nice photos with people sell the best!
This helped to understand what stock photography sites were looking for!
Day 2 – Find the Best Photos I’ve taken
Now to inventory what photos I already have. Having taken thousands of photos for fun, I had to assume some were decent.
So I plugged in my external hard drive carrying every photo I’ve ever taken through college, life, and traveling. That night, I went over 4,000 digital photos.
I sat at my tiny desk with Netflix on in the background as I clicked on my computer’s right arrow button nearly 4,000 times to go over every photo I’ve ever taken in the last 10 years. Most of these were taken with a point and click camera, so the quality wasn’t great, but a few gems were discovered. =)
I pulled all the good photos into a folder. I ended up with 100 great photos.
That’s still too many! I had to limit those 100 great photos down to 60 awesome photos, then down to the 30 all-time best photos I’ve ever taken. Later ranking them 1 to 30.
That was hard, very, very hard.
I had to keep in mind, I can’t control how these photos will be used. A family portrait may be used in a prescription depression magazine ad, so I was cautious and respectful to other people in the photos. Plus I would need photo releases signed (and submitted) with any people in them. I could download these online, but I simply avoided people to make things easier.
I was ready to apply to Shutterstock!
Day 3 – Apply to Shutterstock
Yes, you have to apply, they don’t just take anyone with a phone camera.
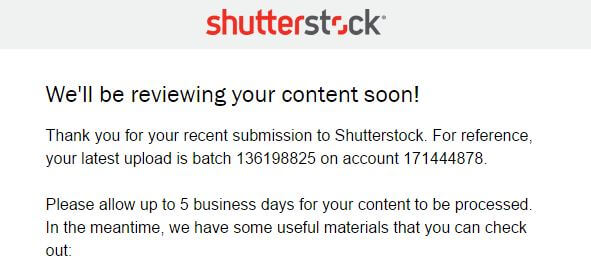
So I submitted to Shutterstock & iStockPhoto, but we’re still focusing on Shutterstock. Shutterstock was A LOT faster with the review process, taking around 5 business days. iStockPhoto took around 30 days.
So I went here to apply to Shutterstock.
I created a profile (basically username, password and verify email address). Then they requested I upload around 14 of my best photos. They would review these for the application process. Yes, it was a process, they have an official review team that reviews each photo uploaded to make sure it matches their quality.
Luckily I already went through and had my top 30 ranked. I added my top 14.
Then I hit submit and started the waiting game.
Day 4 through Day 8 – I wait
During this time I played with other ways to make money while I waited.
Day 9 – I’m approved
Finally, on Day 9 I get the “You’re Approved” email. I was honestly a little shocked. I knew the photos I submitted were MY best, but there are MUCH more talented people out there with better photography. I wanted to reply back and say “Really? Are you sure I’m approved?”. However, I kept my mouth shut and moved on.
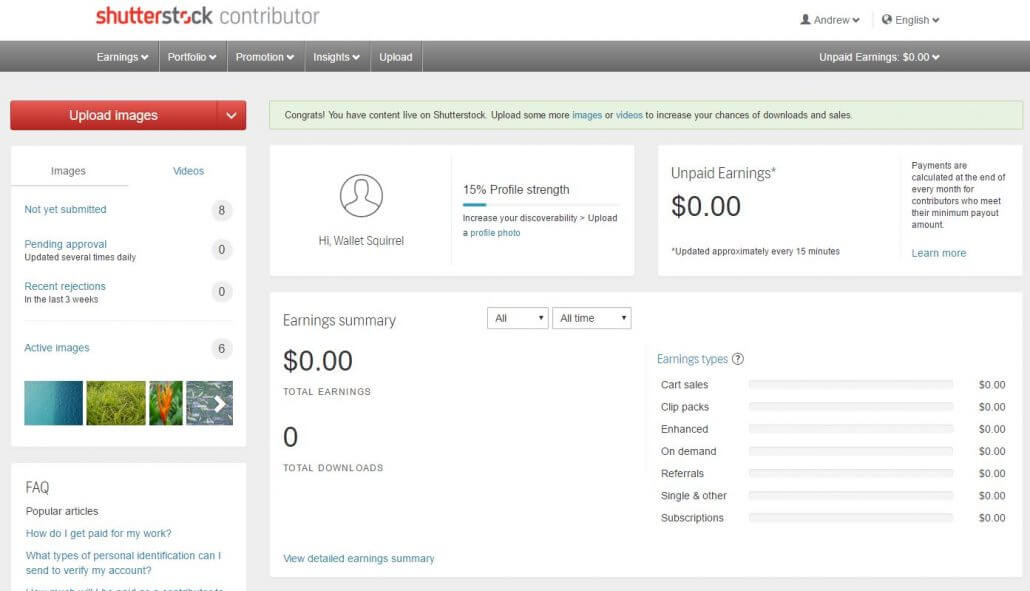
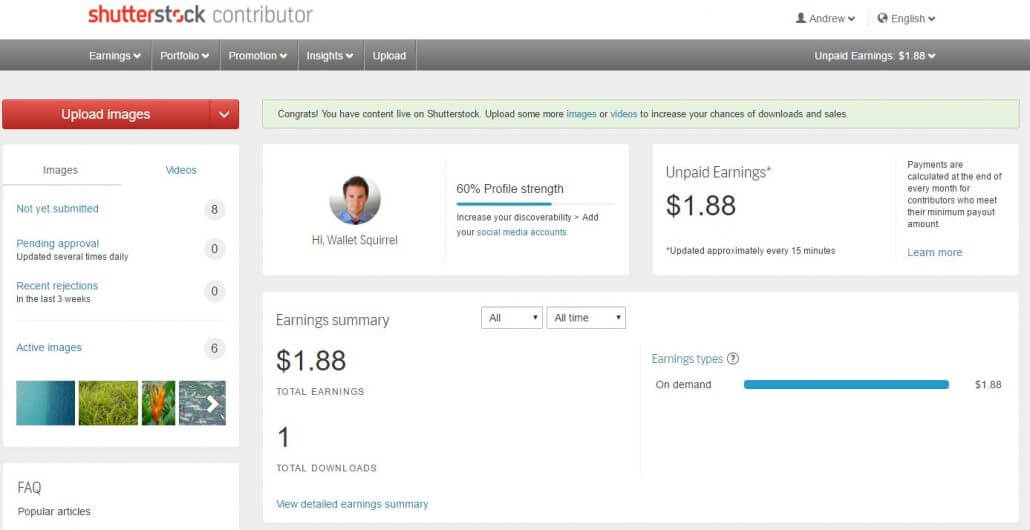
So I hop into their platform and start familiarizing myself with their dashboard. It looks a little something like this and hasn’t changed in the last couple years.
I spent time filling out the rest of the information and verifying who I am for tax purposes. They are very keen on this, in fact, they ask you to submit a photo of your driver’s license to confirm who you are. That part was a little weird uploading a photo of my driver’s license but figured I’ve gone this far.
Remember every photo you upload, even as a contributor, has to be reviewed by their team first, even after you applied with those same photos. I guess it’s a different review team.
I started by selecting my top 8 photos for consideration to sell on their site. Now more work.
Having a nice photo isn’t enough, you’ll need to add categories to describe each photo, such as “travel, nature, urban, etc.”. Then add around 50 description keywords. These are how people search for your photos when they’re looking for a stock photo to purchase.
This part is crucial!
Once I selected all the keywords and categories for each of my 8 photos, I clicked “Submit” to have their team review my photos with those specific keywords. The idea is you’re not using unrelated keywords, have the necessary photo release forms if you’re including people (yup, upload those too), categorizing the photos correctly, and the photos are high enough quality.
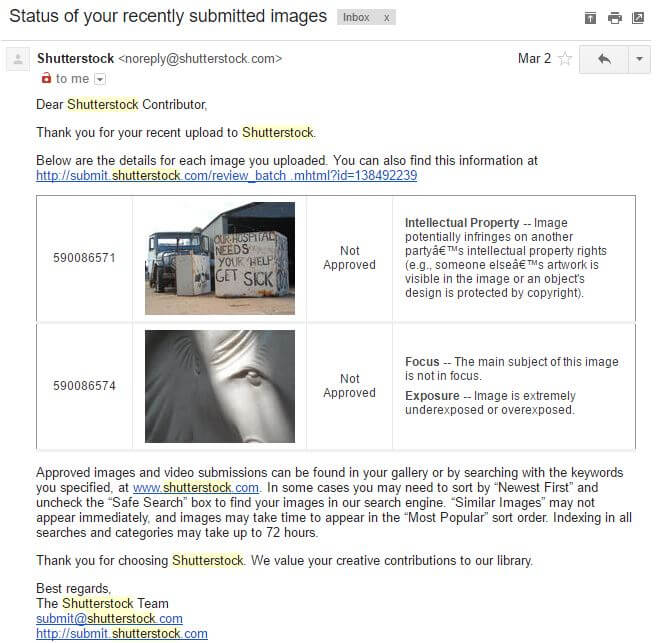
Two of my photos got rejected rather quickly. They at least tell me why.
However, the other 6 photos were approved! These are the best photos I’ve ever taken right here. If you agree, feel free to purchase them, but I have no idea what you’d use them for. I just like them.
Day 10 – Sell Stock Photo, Check!
Someone liked my photo and bought it! I’m not sure who it was, but I made my first sale on Shutterstock for my “dock” photo taken in New Zealand. Maybe it was my mother, she still has my crayon drawings from 1st grade.
Not sure how they found it, just searching for “dock” won’t really find it. The term “dock” is pretty saturated. They must have searched for some of the additional keywords as well.
I can see how other people may use this as a stock image though. It’s very calming. The only thing missing is some kids running off the end, into the water.
So finding the right keywords for your photos makes ALL THE DIFFERENCE. You should be spending 30 min on keyword research for each photo and don’t be afraid to look at your competitor keywords on similar images.
How much did I make?
Lesson Learned – I was most disappointed that I can’t control the pricing. This is entirely controlled by the website. The cheapest they sell photos for are $29 for 2 photos, so we can assume they sell the basic quality photos for $14.50 each.
From my one download, I made $1.88. It’s not great considering Shutterstock is taking 88% and I’m getting 12% of each sale, but it’s what I have to deal with since it’s their marketplace.
We’ll overlook the fact that I only made $1.88 on one photo, or 12% of the price online.
Some people can make a living off it for sure, but as I mentioned our own Adam in his recent article “5 Simple Ways – How to Sell Photos Online” said he made around $1,000 off one photo of the St. Louis Arch. He uploaded it once and has continued to receive checks from it over the last year.
What I Would Do Differently
Now the photos I uploaded weren’t the highest quality (it was just a 2MP point and click camera). In the future, I would invest in a nicer camera. I’ve been thinking about a camera that would be great both for photography, and video recording.
This would allow me to sell stock photography, stock video and start vlogging for additional money. Personally, I’ve been looking at the Canon EOS M50 Mirrorless Video Creator Kit. It has everything I need for all three, all packaged together!
The only addition to my dream setup would be to add some nice, but cheap lighting stands or ring light to make everything pop and look more professional.
Conclusion
I’m continued to be excited about stock photography even though I only received 12% of the total sale.
I suspect the 6 photos I uploaded won’t do great, but they’ll continue to bring in a few bucks without any additional effort on my part. Plus I can add more as a Shutterstock Contributor now.
Now that I know what type of photography sells best, I can shoot some new photos to sell online as another way to make money! Maybe grab a suit and take photos in conference rooms for the highly popular business attire photos. Every photo I take is just another stream of passive income with stock photography!
Have you ever sold stock photography?

Wallet Squirrel is a personal finance blog by best friends Andrew & Adam on how money works, building side-hustles, and the benefits of cleverly investing the profits. Featured on MSN Money, AOL Finance, and more!

